Lockdown Special: Liquid Pixels – a tutorial by Derek Kunstmann
The Moon Exhibition Lockdown Special aims to support the creative community during the crisis by connecting them and giving them a platform to express their ideas.
Isolated times lead to creative ideas, and we received plenty of interesting projects which we will be sharing in the following weeks. In our first edition, Derek Kunstmann shows us how to make psychedelic, liquid art in Photoshop.
LIQUID PIXELS
About the Project
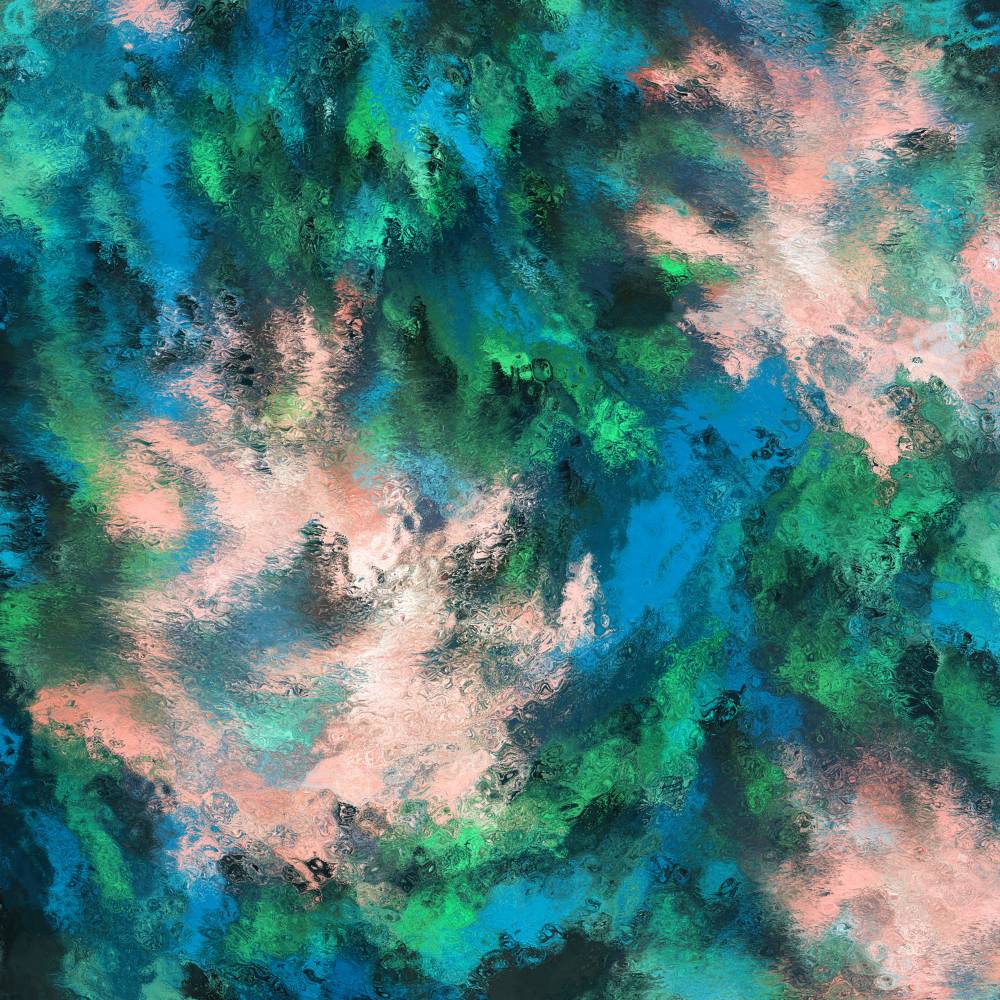
This project started a few years ago when I wanted to dive into “liquid art” often known as “marble effect”. As a needy student and with the lack of an art studio to make a mess, I was not able to buy the materials needed. I have been using Adobe Photoshop for quite a while and have a great passion to “push around pixels” as the Germans use to say, so I had the idea to generate a digital method to imitate the marble effect. At the same time, I had a project running with a psychedelic rock band so I could use some nice textures.
The Method of Liquid Pixels
In these step-by-step instructions, you can follow the steps as described. But take it more like a dynamic recipe, where you have to watch your results and find out what gives you a better result. It is totally experimental and trial and error. Also, make sure to save your steps in between by hitting Command + J. This will make a copy of the selected layer so you can go back later if you are not happy with the results.
Step 1
I started in Photoshop with a 3000×3000 pixel canvas with a 300 dpi resolution. Of course, you can choose any format.
Step 2
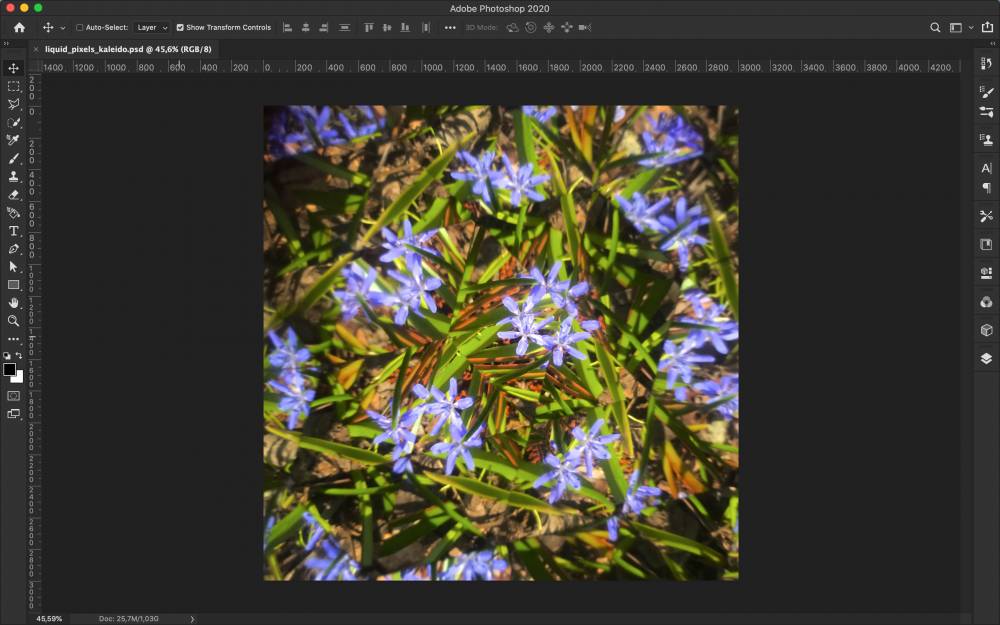
At first, we need some colour. Just like you would paint on a canvas. You can either just use the brush and put any colour you like or place a photo. I used a picture I took with a kaleidoscope. Right-click the layer and rasterise it.
Step 3
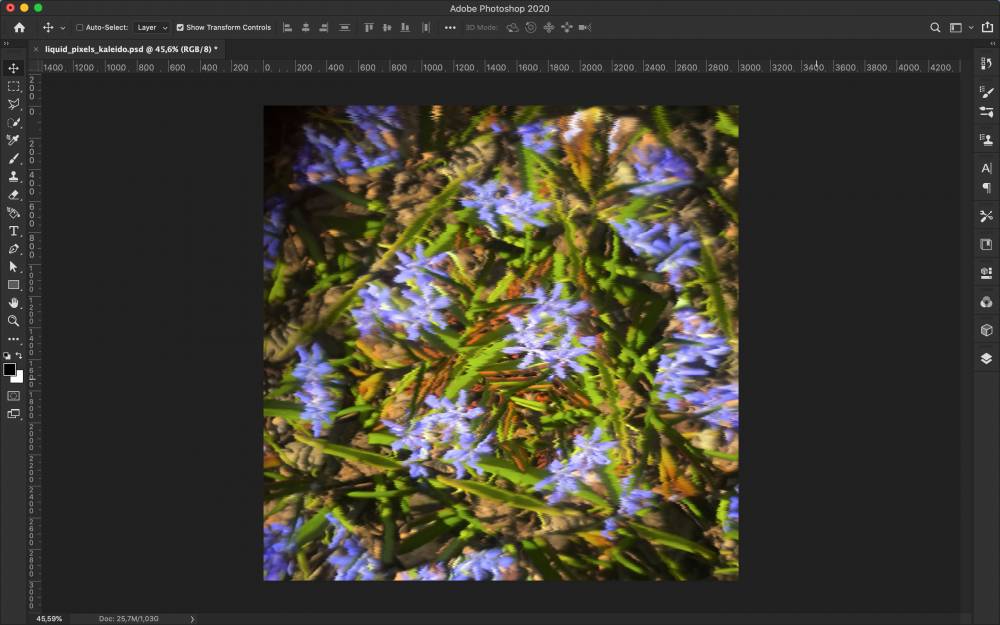
Next thing is to blur the image by using the effect you can find in Filter > Stylise > Wind… Then choose Stagger and select the direction. As you are limited to either left or right if you want to blur downwards or upwards you just have to turn the picture by 90 degrees. (Image > Image Rotation or by pressing Command + T and turning it with the cursor holding shift)
Step 4
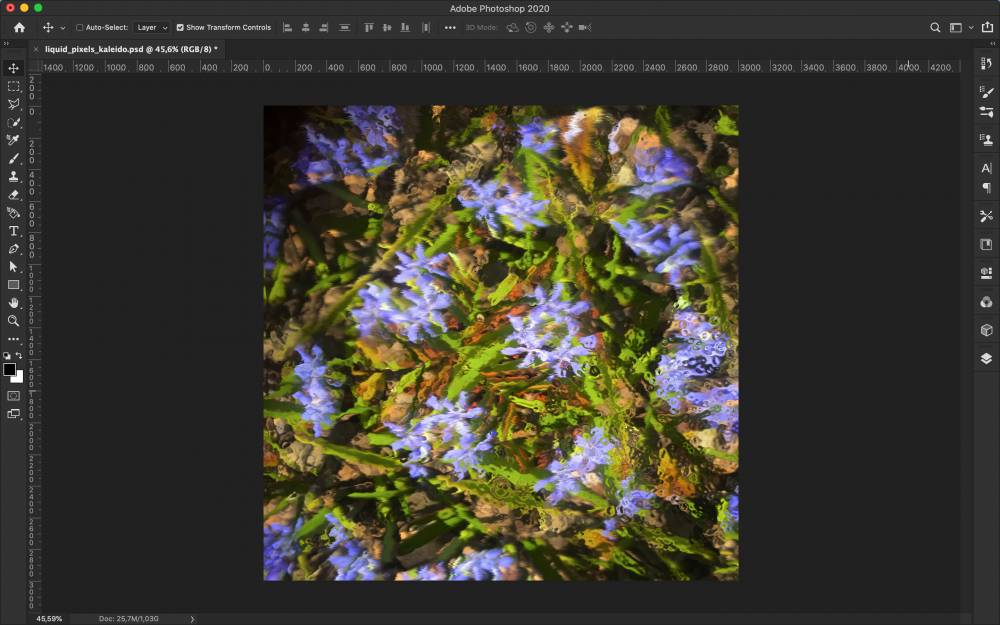
Now we want to liquify the pixels. But no, we won’t use the liquify tool yet. Select Filter > Filer Gallery… there select Distort > Glass. Here we have to make an important change! Select the icon beside the texture selection and click on Load Texture… . Now choose a picture. It serves as a distortion map. It can be any picture but it has to be in the .psd-format. This won’t be necessary in further steps except you intentionally want to change it.
Now adjust the regulators until you like the result and hit OK.
Step 5
The following steps just are repetitions of step 3 and 4. Feel free to mix in other effects or, like in this case, I messed around a bit with the liquify tool. I mostly crop into a piece of the picture that I like. And by hitting Command + U you can change the colours until you think it looks fine.
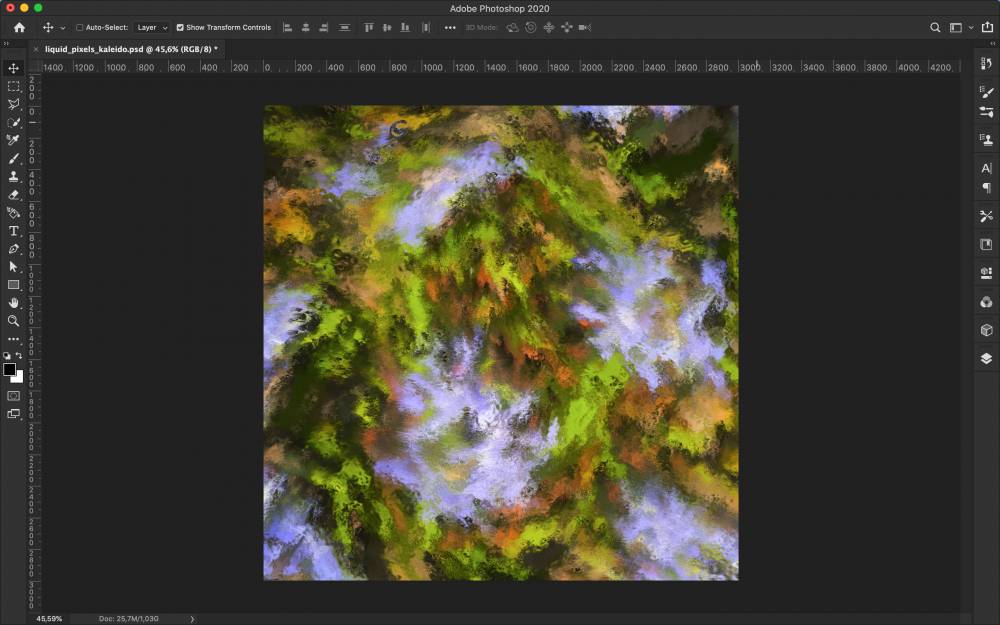
So that is it. As already said the process is going back and forth and looking for an image you are happy with. Experimenting with the tools given to you can lead to really interesting results. Especially if you combine them and find new uses for them. Have fun!
About the Creative
Derek Kunstmann is a Bavarian designer, specialised in visual design and interaction design. Looking up to his father, who ran a graphic design agency, he got in touch with creative apps at a very young age. According to this, he studied architecture in Regensburg and afterwards Design in Nürnberg. Now, located in Abensberg, Derek is working as a freelance designer. He’s got a passion for abstract art and experimenting with new techniques.
Feeling inspired? Show us your results by tagging #lockdownspecial or participate with your own project here.